


Sigh....life has been C-R-A-Z-Y!!
I know, I know.... I've been MIA lately...but it's been a necessity. There is just way too much going on in my life so the RHP is on the back burner for now. I am still crafting and cooking and re-doing stuff so I have some things in my blogging arsenal but my family and school are first....so the blog suffers....don't give up on me yet!
Okay, so anyway...I got this Awesome record player years ago for FREE on craigslist...and even posted about it HERE and how it's one of my favorite things. I love old pieces that are nostalgic like this. I wasn't in love with the color though so after much deliberation and hemming and hawing (and Pinterest research) I decided which direction I'd like to go....homemade chalk paint. I tried a few recipes on a trash-picked end table and on two yard-sale night stands and wasn't too impressed. They all seemed to make the paint WAY too thick! And the result wasn't to my perfectionist OCD standards...I still love the pieces I painted but they were my guinea pigs. THIS piece, however, I loved how it turned out. I painted TWO coats with NO SANDING OR PRIMING!!! Then I applied wax. This post won't be a step by step tutorial, that'll have to come later when I've perfected it...maybe I'll even do a video...because I totally had to watch some youtube video how-to's to decide what to do.
For my recipe:
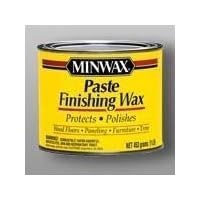
I mixed two cans of Valspar sample paints in tropical oasis and one can of gray mountain smoke in a plastic paint container. (You can use to old plastic ware) Then in another bowl I mixed 1 Tablespoon of plaster of paris and 2 Tablespoons of HOT water. I bought a few forks and a whisk from the dollar store to keep in my paint supplies for this. I whisked it together until there were no lumps. Then I added only half of the mixture to the paint and stirred. It thickened up but not TOO much. All the other ones I tried were awful. Maybe they worked for them, but it DROVE ME CRAZY! This stuff dries seriously fast too! I re-coated in half an hour. The next day I used Briwax clear paste wax which I got off of amazon to coat the entire piece. Make sure to use a rag to wipe the wax into the paint and wipe off the excess. Then after about 20 minutes I sanded it to give it a little distressed look. I read somewhere to sand AFTER the clear wax so you have less dust and since I painted inside the house, this was what I was going for...less dust. Then I added Minwax DARK paste wax and wiped off to give it a more aged look. I would have applied another coat of clear wax if it was painted on the top, but since I only painted the sides, I didn't bother. Ta-dah!! The most lovely record player re-do ever!! I may end up stripping the top and staining it darker at some point, but for now...it'll do. :)

You can kinda see the sample paints next to the container.


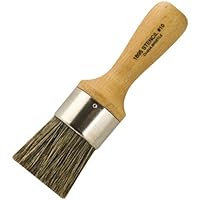 I used this Wooster size 10 stencil brush from amazon for the clear
 wax and a Wooster size 6 stencil brush from amazon for the dark wax.


No comments:
Post a Comment