Monday, September 24, 2012

{DIY} Removable Pillow Cover


Okay, so I decided to give you my novice version of a slipcover for those ugly throw pillows  you may have stuffed in a closet somewhere. Here's mine...I wasn't lovin' the 1992 mauve color. Instead I wanted it to match my Shabby Chic End Table in my living room so I got some fabric from JoAnn's and went to town. 

FIRST, WASH AND DRY YOUR FABRIC according to its directions! Then iron it. Do not skip this step!

First I got some newspaper (use tissue paper if you want) sharp scissors, and measuring tape.


I measured this pillow to be 16" by 17 1/2". So..I needed a 1/4" seam allowance so I added 1/2" to each measurement which brought me to 16.5" x 18" 


Now I applied the measurements to the newspaper and cut out my new pattern. For the back, since I wanted to make a slip cover I planned to have two overlapping pieces. So I took the longer measurement (18") by 6". The second piece I (should have) measured 18" x 14". You want the second piece to be closer to the size of the entire pillow so it covers adequately. 


Once you have the pieces all cut then pin, pin, pin. Don't be cheap with the pinning either. You want it to end up right.


I did two identical pillows so I overlapped the fabric so I only had to make the cuts once.

Here the front piece all cut out


This is the smaller back piece.


All the pieces cut out.


Now, take the two back pieces and on the long edge that you plan to sew for the opening fold it over and press. Then fold it over once more. I folded at about 1/8"-1/4" but didn't measure this part. I just wanted to hide the JoAnn logo. Iron both steps.


Next, top stitch the entire edge that you folded over. This will be the finished edge when you're done. Repeat for the larger back piece.


Next, put pillow front and the smaller back piece together with Right sides together. Put the small piece on first. Pin the upper edge.


Lay the larger back piece over the front and smaller piece. Make sure the finished edges are both in the middle of the pillow. Pin away!


Sew all around the pillow case with a 1/4 inch seam. There usually are markings on the machine to help guide the fabric. When you reach the corner, stop. Make sure the needle is through the fabric and lift the presser foot. Turn the fabric and put the presser foot back down. Keep sewing. Do this at each corner.


When you are finished sewing take the corner and clip straight across like this. It will help prevent bunching in the corners. 


Here's what it should look like. 


Turn the pillow cover inside out and make sure to push out the corners. Remember I said I "should have" measured the larger back piece differently? Well this is why...there wasn't enough fabric to overlap to cover the pillow adequately. 


So..since I have a pretty cool sewing machine I improvised. I used my button holer attachments and got out my sewing manual and made a button hole and sewed on a button.  


Friday, September 21, 2012

{Philly Love} Philadelphia Zoo


So, another stop on our Staycation '12 via the CityPass was the Philadelphia Zoo. It was a gorgeous day. The last time we went to the zoo was with Princess8's school and it was miserable, wet, rainy and chilly. Not fun. This day we had a great time, especially since their Daddy was able to join us. We didn't pay for parking because we found a spot on the street so we were glad about that. Surprisingly the zoo family membership is pretty cheap so we may consider doing that in the future.


Tigers are such beautiful animals. I prefer to stay behind that glass though :)


We had to move out of the way so they could move the camels. I think they give out camel rides but we must've just missed it.


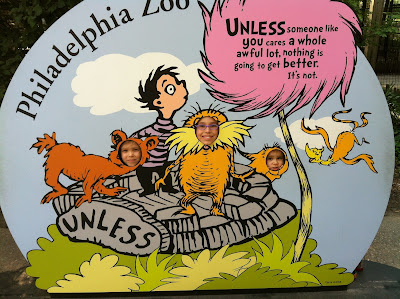
These girls make me take pics of them whenever there is one of these things.


In the petting zoo with the farm animals.


I love giraffes too. Right after this we saw Cecily Tynan (our Channel6 weather girl) walk by. She did the news from the zoo that day. I should have asked for her autograph, but chickened out. Oh well..


The feature at the zoo right now is The Lorax. It was pretty cheesey but the kids kinda liked it. I loved the movie The Lorax though! It was a great movie with a good message in it. May have to buy that one. 
Well, that's about it for the zoo. The Philly Zoo is pretty great. They have a ton of animals and are reasonably priced. I'd definitely recommend it for anyone visiting the area. We will be going back again. :)

Tuesday, September 18, 2012

How to Roast Garlic


Roasted garlic is so easy to make! I don't even use my regular oven unless I am roasting a lot. I just use my toaster oven set on convection bake. Preheat oven to 350 degrees Fahrenheit.


All you do is take your head of garlic and slice a little off the top like this.


Drizzle with a little olive oil and sprinkle with salt and pepper, if desired. 


Wrap it in the foil like this. Here I am roasting a lot because I was attempting to make Roasted Garlic Soup. I wasn't thrilled with the results of this recipe which is why you haven't seen it yet. 


Roast in the preheated oven (or toaster oven) for 30 minutes.


Mmm...doesn't that look amazing?! I LOVE Garlic! DH....not so much. I usually have to make sure I do this when I know he won't be home for a bit so I can air out the house. He likes garlic, but not the strong smell.


Once it's cooled enough to handle just squeeze the cloves into a bowl. This is my favorite part because I get to lick my fingers when I'm done. :)


There ya go! Roasted garlic. Super easy and great for recipes like Roasted Garlic Grits....we'll get to that recipe one day.... Enjoy!

Thursday, September 13, 2012

Oriental Broccoli Salad


So this is another one of my sister-in-law's amazing recipes. It's super simple to make and delicious! I love it!  


Ingredients:

1 package ramen noodles - Oriental flavor
1 package Broccoli Slaw
1/2 cup roasted sunflower seeds
1/2 cup slivered or sliced almonds
Dressing:
2 T. sugar
seasoning packet from Ramen noodles
1/2 cup vegetable oil
3 T. apple cider vinegar


I use this shake container when making the dressing. Just combine the sugar, oil, seasoning packet, and vinegar. Shake it up to mix.


Next, in a bowl break apart the uncooked Ramen noodles.


Add the broccoli slaw, sunflower seeds, and almonds. Pour dressing over salad and toss to coat. Enjoy!!


Saturday, September 8, 2012

Ubokia: A Unique Shopping Experience


A One-Stop-Shop for The Redheaded Princess Readers
So, what is Ubokia? you ask? Well, Ubokia is the new guy in town. Think the classifieds meet craigslist. It's a secure place you can go to buy stuff you want or to sell it. On top of that you can find people who already want what you have to offer! Talk about shortening the game plan!

How Does It Work?
Well, what you do first is create a free account on Ubokia's website. It's super simple...you can even use facebook to login! How easy is that?? Next, let's say you're lookin' for a vacation. C'mon..who doesn't need a vacation? Then just type in your search. OR let's say you want to sell your timeshare week...you can do that too! Maybe you want to see if anyone is looking for a timeshare, then you can connect with them! On Ubokia you can find anything from electronics to housing to vacations to furniture. You can sell them too! How cool is that??

So, WHY Ubokia?

  • With uTrust, Ubokia is the safest way to buy online.
  • Buying through a blog marketplace means you are connecting with other like-minded people - making it easier to find what you want and in general your interactions are more pleasant than something like Craigslist.
  • Ubokia is easier for buyers because all they have to do is post a want and let sellers come to them. No more searching!
  • Ubokia is easier for sellers because they don't have to wait to potential buyers to view their products. They can immediately connect with buyers.
One really great thing about Ubokia is their ugroups. The Redheaded Princess has its own ugroup so if you'd want to join I'd really love it! But what's cool is you can even create  your OWN group. Maybe you a part of a small group at your church or maybe you wanted to create one for your coworkers. Then you could just all put your wants and needs on there. How great would that be? 

So, Join Ubokia Everywhere and stop searching for what you want.

Look for the Marketplace in the tabs at the top of the page or in my sidebar.

*I was compensated for this post but all opinions expresses are my own.*

Friday, September 7, 2012

{DIY} Distressed Dresser/TV Stand


We were fortunate enough to be given a flat screen tv from our old next door neighbor...I know, awesome, Right? Well, the old tv went downstairs but because it is such a beast we needed to keep the stand we had with it because it can support the weight. So I was on a search at thrift stores, yard sales and finally craigslist. 

I found this beauty on craigslist for 60 bucks. It was in good shape but I was not lovin the color. 


First, with my Mouse electric sander I sanded down all the glossy finish...with the help of my princesses and my handsome nephew.


Next I painted a coat of Prairie Sage by Glidden but it seemed way to light after I got it on. Luckily I only had purchased a quart so back to Home Depot I went.


Next I got Frosted Pine semi-gloss by Glidden in a quart and painted two coats. Allowing 24 hours between coats and sanding lightly between coats too.


Next I used my sander and sanded down the edges and all the places I wanted distressing down to the bare wood. I also hand sanded some of the more difficult to reach spots.


After wiping down the dust I used a light colored staining pen to stain all the exposed wood and wiped down the excess.


Then I applied two coats of a semi-gloss polyurethane allowing it to dry at least 24 hours in between. I am an impatient person and this project seemed to take forever! I am very pleased with the final product though. The color turned out perfect! And I kept the original hardware. I thought they turned out nicely.


Related Posts Plugin for WordPress, Blogger...