

Hey Everyone! Hope y'all are having a great new year! Today I'm going to share with you my favorite DIY project to date. This has been several years in the making because we are making a Family Tree in Pictures! I'm one of those people who cherish where I came from. I want to know my background and see the people who are a part of me. It's crazy to see features of mine in the faces of these strangers I've never been so fortunate to meet. So after getting photos from several sources like my Grandmother, Aunts' facebook pages, mother-in-law, etc..I felt I had enough to at least get my project started. It's certainly not finished but I love what I have so far. I had a vision in my head of what I wanted to do after I saw a wall in Paula Deen's home with framed pictures of her ancestors. I put that together with old farm windows and then began my search. I looked on Craigslist for the past six months for either old farm windows or a door with lots of window panes. FINALLY on Christmas Eve I found a farm house not too far that had a ton because they just replaced ALL their windows! I got 6 for 40 bucks! (I only needed 3 but figured I should grab extra just in case)

Once I got them home, I cleaned the windows and frame and windexed the glass.

I used a toothbrush I have in the kitchen specifically for cleaned nooks and crannies and got all the dirt out of the many crevices. Next, I couldn't figure out how the heck I was supposed to hang these on the wall securely. We thought about drilling wall anchors and doing hinges so I could flip the windows up. But I didn't want to do that because I'd rather be able to take them off the wall if I need to. So I decided to check out Michael's.

Here's what I found. This PerfectHang picture hanging kit which is good for up to 30 pounds! For 5 bucks! Great deal! And it was SOOO easy to install!

First thing to do is to screw in each hook. I just eyed where I wanted to put them..Didn't bother measuring exactly. Here, I used a screw gun which took a total of 30 seconds for both. However, I discovered that it's not a good idea to have the hanging cord so near the top so I ended up moving them more like a third of the way from the top.

Next, I followed the diagram on the package to tie on the cord. You can cut the wire with scissors if there is excess but make sure it's secure first.


I never used one of these things before but I realized I LOVE IT! It holds up to 30 pounds and the design is great because the pin goes in at a downward angle and only makes a pinhole. So if you mess up...your wall isn't destroyed!

I did this with all three of my windows and then hung them to line them up.

Next, I purchased several yards of burlap for $3.99/yard from Joann Fabrics with a 40% of coupon. I got 3.5 yards so it was super cheap! $7! And I have extra because I wanted to be able to use it for other things too and since the nearest Joann's is 20 min away I really didn't want to have to make another trip.
Now, I laid the fabric on the window and stapled it with a staple gun in one corner. Then I used my fabric shears to cut the piece to fit.


Nex, I used a sharpie to carefully outline the window panes so I knew where the pictures should go.

My next dilemma was how to stick the pictures to the burlap without being permanent but strong enough to hold. I discovered these in Joann's. UGlu Dashes. They stick to fabric AND paper! I think they were $5 for 162 dashes.

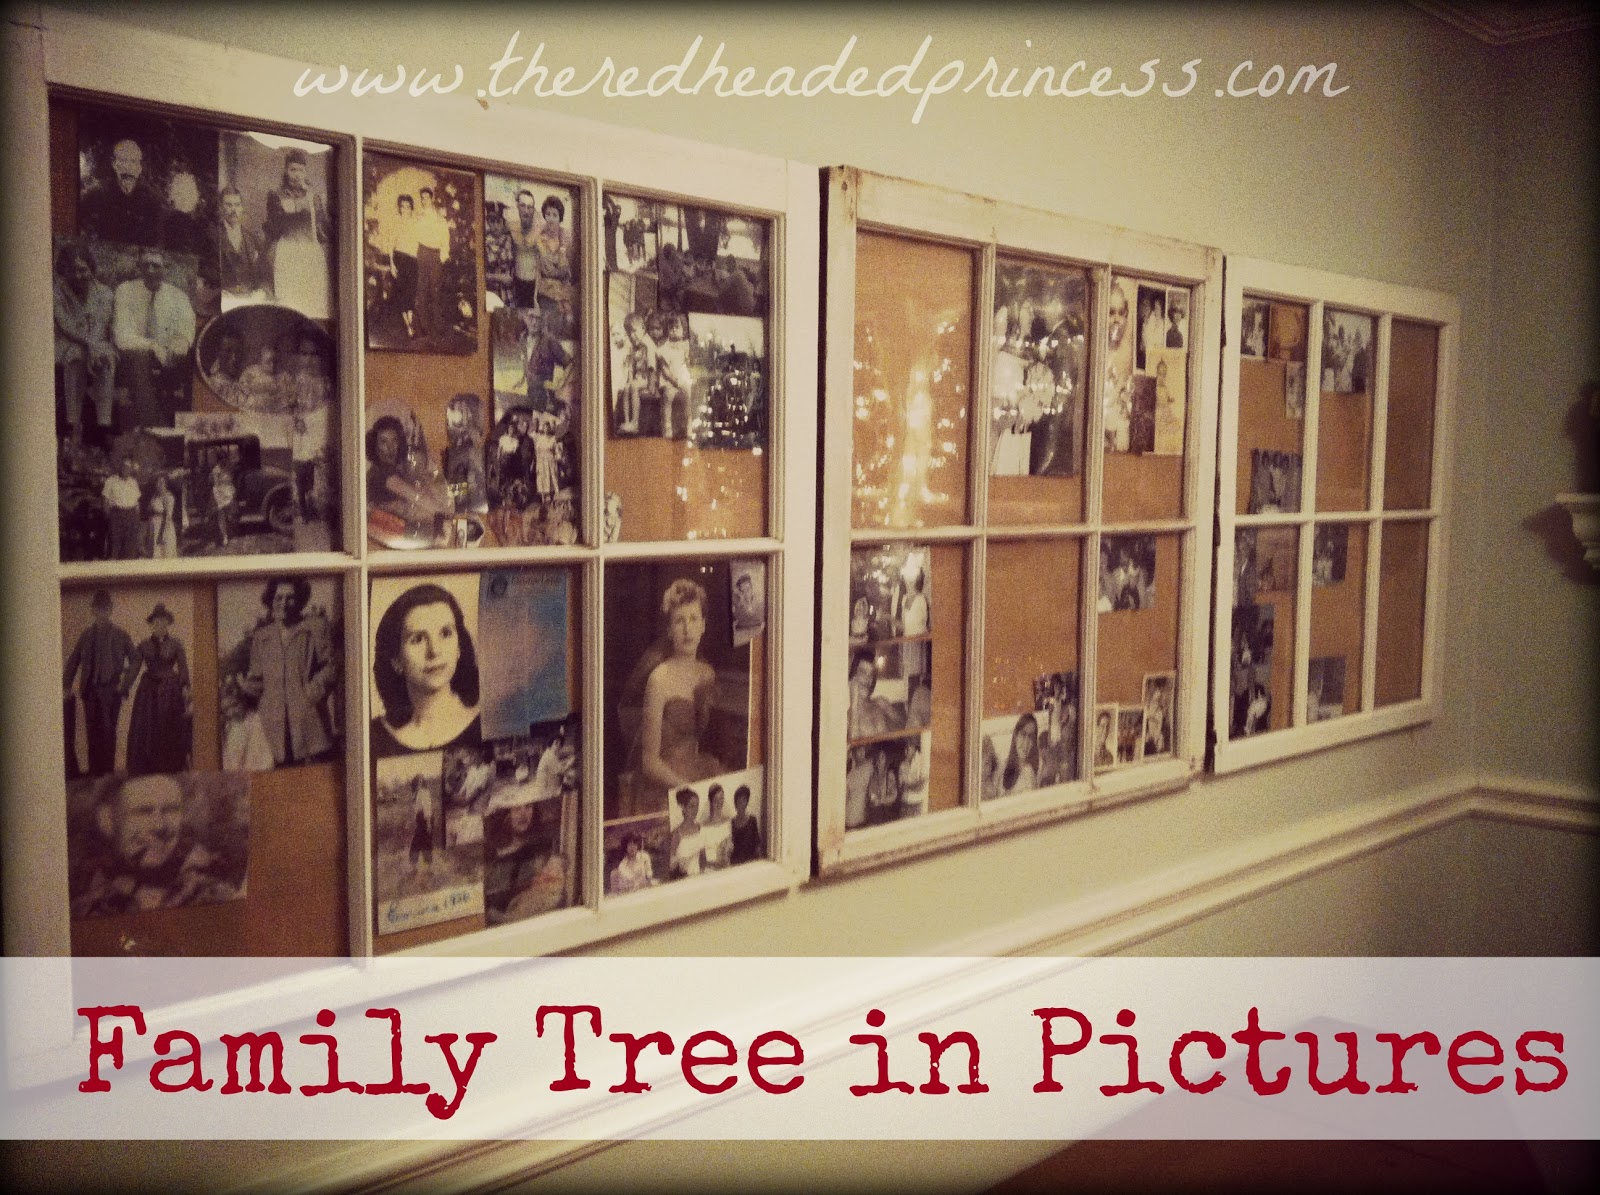
Now's the fun part! Lining up my amazing pictures! I even have some from the late 1800s of my great great great grandparents! I used this window for MY side of the family. The upper panes (and lower right) were for my mom's sided of the family (I have a lot more pics of her side and the pic of my Grandma Ethyl is original and she has a hand-written note to my grandpa so this one is very special and deserved it's own window). The bottom panes are for my dad's side. Once I was done, I carefully pulled the stapled corner out and discarded the staple. I carefully flipped over the burlap square and inserted it onto the back of the window. Then I used the staple gun to secure it to the back but left the bottom open so I can add more pics until I feel like I am finished. I did this with the other two panes as well.

The center pane of the center window is my wedding photo. The pane beneath that is for a family pic of me, my husband and daughters and of me and Prince Charming when were were kids. Left two panes are for my parents and the right two are for his parents. The window on the right is for HIS side of the family. The upper three are his mother's family and the lower three are his father's family. Here's a closer look....

My side of the family


As you can see there are quite a few blank spots which I hope to fill with more ancestors. I am really excited to see these pictures and to remember the people that came before us. I think sometimes, there'll be a day when I have great great great grandkids and wonder, will they know anything about me? I think so especially with the modern technology we have. It was different back in the days of my ancestors especially since pictures those days were so rare to begin with. I will pass this family history on to my kids and I hope they have the same appreciation and cherish these photos the way I do. It's really neat to see my daughters' faces in the images of their grandparents as children. Words cannot describe how much I love his project! I hope you enjoy it as much as I do and maybe inspires you to do something similar for your family. Happy New Year, All!


I love old pictures. I did a gallery wall of black and white photos of wedding photos of our grandparents. I love your dyi frame.
ReplyDeleteThis is awesome! Such a special project, Jess.
ReplyDeletethanks, Ang!! Love ya!
ReplyDeleteThose types of pictures are so special! :)
ReplyDelete