Showing posts with label Crafts/DIY. Show all posts

Thursday, February 13, 2014

{DIY} Valentine's Day Cards


Hey Y'all! It's the 2014 version of our Valentine's cards. What I did was take a picture of my girls out in front of our house. Then, they sat with me and helped make the editing decisions when I uploaded them to picmonkey.com. Picmonkey is awesome! you can create borders and overlays like the hearts.  Just be creative and don't be afraid to play around. You can always hit 'undo'! 
Then, I sent them to Walgreens and picked them up the next day. Hope you like them! Enjoy!


Saturday, April 6, 2013

You Want to See This!!

Okay..so really...I think you'll LOVE this small Etsy shop! One of my best friend's mom just opened an etsy shop where she sells the most adorable primitve items that she MADE BY HAND! If you love that style, then you'll love these! I helped her get set up and one of the items she listed even has vintage lace which was handmade by her aunt..Seriously! How cool is that?? So what are you waiting for! Go Check it out please! She's super sweet and extremely crafty! So head on over to:


janetliples


post signature

Monday, February 11, 2013

I've Been Shot by Cupid! So Pinteresting!

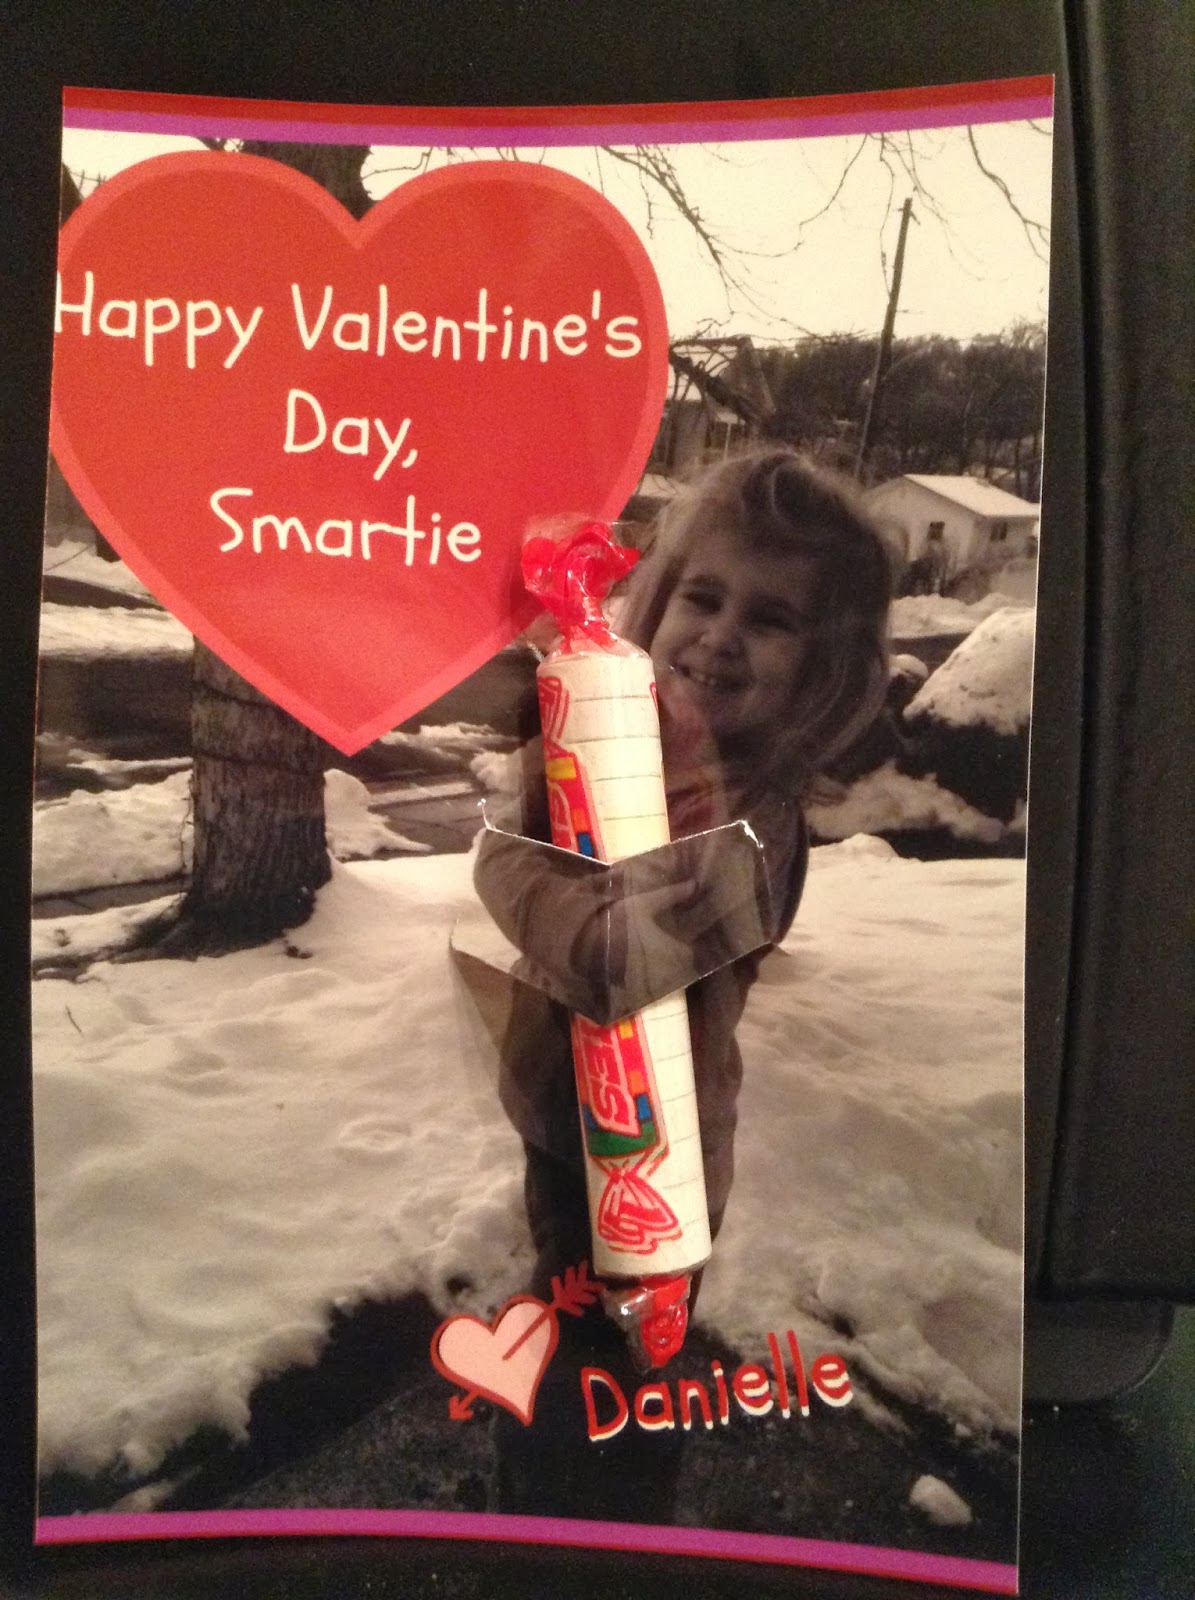
So Valentine's Day is only a few days away and my Princess9 and I were on the search for what to do for valentine's cards for her classmates. We loved last year's pinterest inspired cards so she was really excited when we came across this PIN on Pinterest. So we headed out back to create our picture...


Next, I headed over to Picmonkey.com and did my free editing...love that site!


We paired it with our A.C. Moore Animal Print Pops that we made and...

Voila! .... One of the cutest Valentine's Cards EVER! ( I only wish I would've made the words a little smaller bc when printed at Target the "I" got cut off...oh well...L.L. (lesson learned))

 
Happy Valentine's Day!!!

post signature

Sunday, December 30, 2012

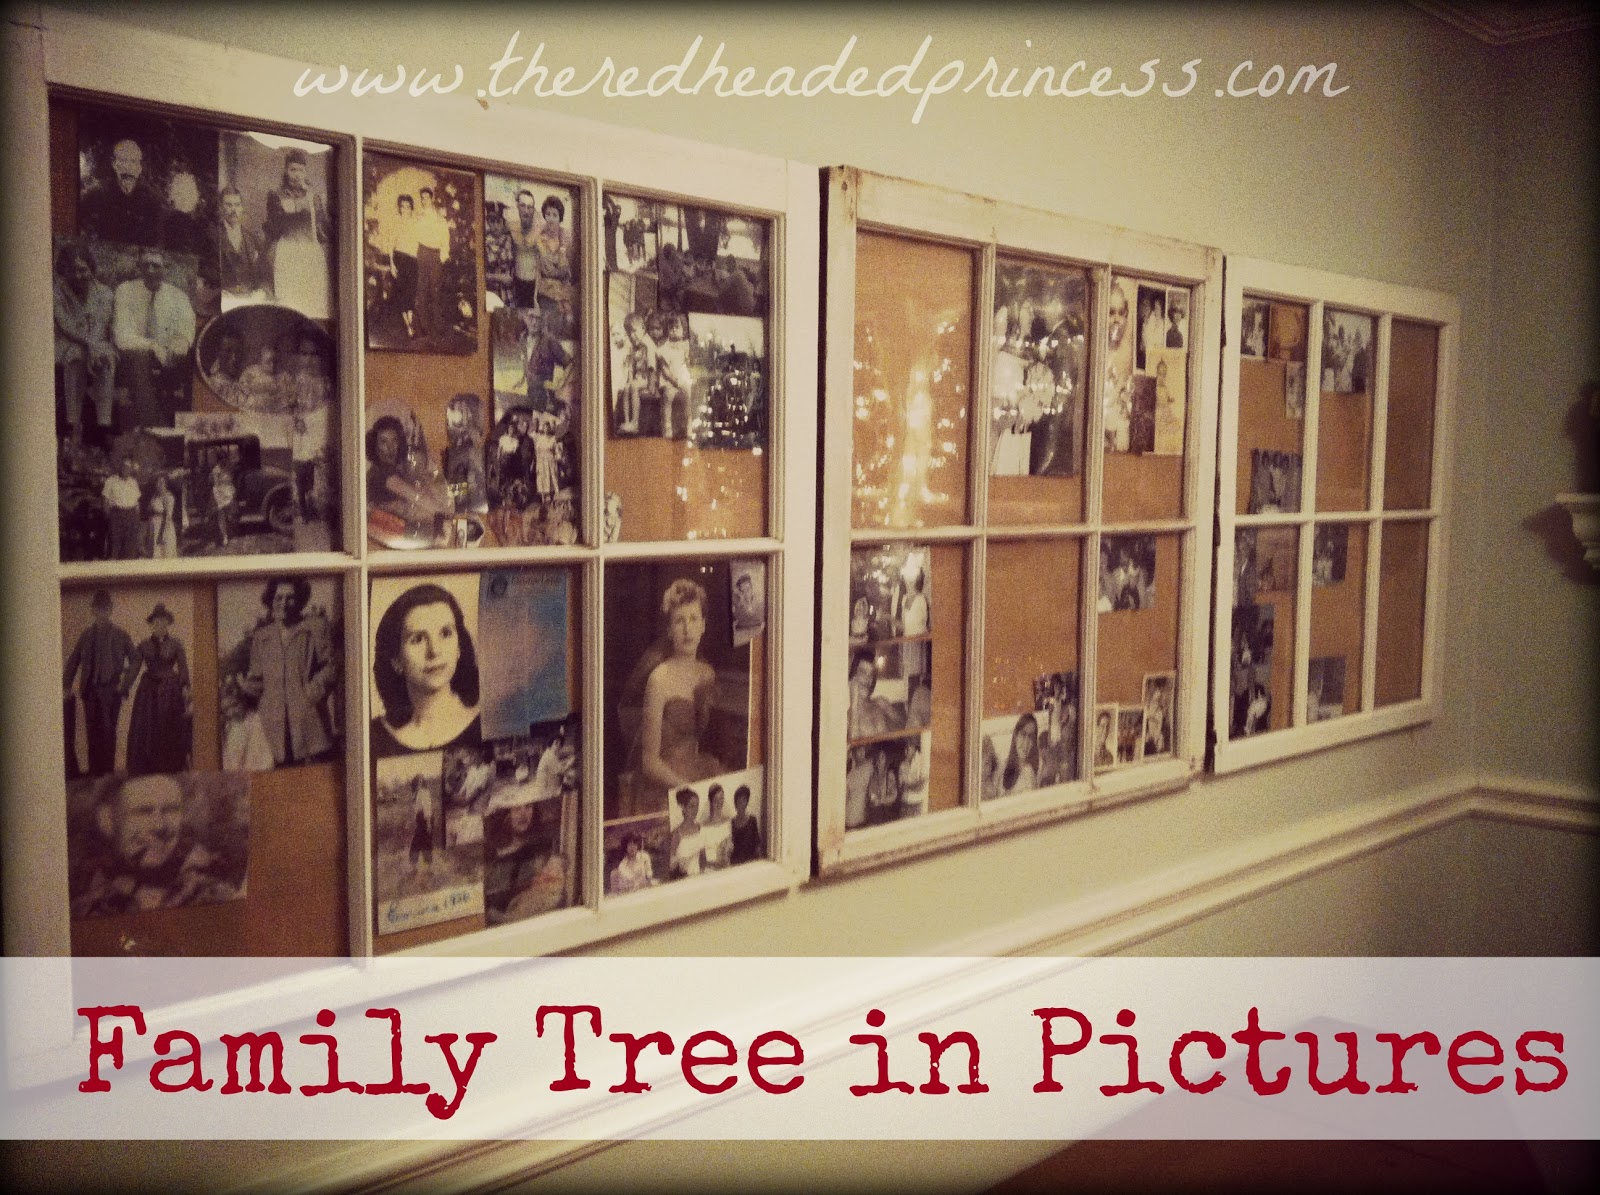
{DIY} Family Tree in Pictures


Hey Everyone! Hope y'all are having a great new year! Today I'm going to share with you my favorite DIY project to date. This has been several years in the making because we are making a Family Tree in Pictures! I'm one of those people who cherish where I came from. I want to know my background and see the people who are a part of me. It's crazy to see features of mine in the faces of these strangers I've never been so fortunate to meet. So after getting photos from several sources like my Grandmother, Aunts' facebook pages, mother-in-law, etc..I felt I had enough to at least get my project started. It's certainly not finished but I love what I have so far. I had a vision in my head of what I wanted to do after I saw a wall in Paula Deen's home with framed pictures of her ancestors. I put that together with old farm windows and then began my search. I looked on Craigslist for the past six months for either old farm windows or a door with lots of window panes. FINALLY on Christmas Eve I found a farm house not too far that had a ton because they just replaced ALL their windows! I got 6 for 40 bucks! (I only needed 3 but figured I should grab extra just in case)


Once I got them home, I cleaned the windows and frame and windexed the glass. 


I used a toothbrush I have in the kitchen specifically for cleaned nooks and crannies and got all the dirt out of the many crevices. Next, I couldn't figure out how the heck I was supposed to hang these on the wall securely. We thought about drilling wall anchors and doing hinges so I could flip the windows up. But I didn't want to do that because I'd rather be able to take them off the wall if I need to. So I decided to check out Michael's.


Here's what I found. This PerfectHang picture hanging kit which is good for up to 30 pounds! For 5 bucks! Great deal! And it was SOOO easy to install!


First thing to do is to screw in each hook. I just eyed where I wanted to put them..Didn't bother measuring exactly. Here, I used a screw gun which took a total of 30 seconds for both. However, I discovered that it's not a good idea to have the hanging cord so near the top so I ended up moving them more like a third of the way from the top.

Next, I followed the diagram on the package to tie on the cord. You can cut the wire with scissors if there is excess but make sure it's secure first.


I never used one of these things before but I realized I LOVE IT! It holds up to 30 pounds and the design is great because the pin goes in at a downward angle and only makes a pinhole. So if you mess up...your wall isn't destroyed! 


I did this with all three of my windows and then hung them to line them up.


Next, I purchased several yards of burlap for $3.99/yard from Joann Fabrics with a 40% of coupon. I got 3.5 yards so it was super cheap! $7! And I have extra because I wanted to be able to use it for other things too and since the nearest Joann's is 20 min away I really didn't want to have to make another trip.
Now, I laid the fabric on the window and stapled it with a staple gun in one corner. Then I used my fabric shears to cut the piece to fit.


Nex, I used a sharpie to carefully outline the window panes so I knew where the pictures should go. 


My next dilemma was how to stick the pictures to the burlap without being permanent but strong enough to hold. I discovered these in Joann's. UGlu Dashes. They stick to fabric AND paper! I think they were $5 for 162 dashes.


Now's the fun part! Lining up my amazing pictures! I even have some from the late 1800s of my great great great grandparents! I used this window for MY side of the family. The upper panes (and lower right) were for my mom's sided of the family (I have a lot more pics of her side and the pic of my Grandma Ethyl is original and she has a hand-written note to my grandpa so this one is very special and deserved it's own window). The bottom panes are for my dad's side. Once I was done, I carefully pulled the stapled corner out and discarded the staple. I carefully flipped over the burlap square and inserted it onto the back of the window. Then I used the staple gun to secure it to the back but left the bottom open so I can add more pics until I feel like I am finished. I did this with the other two panes as well. 


The center pane of the center window is my wedding photo. The pane beneath that is for a family pic of me, my husband and daughters and of me and Prince Charming when were were kids. Left two panes are for my parents and the right two are for his parents. The window on the right is for HIS side of the family. The upper three are his mother's family and the lower three are his father's family. Here's a closer look....


My side of the family


As you can see there are quite a few blank spots which I hope to fill with more ancestors. I am really excited to see these pictures and to remember the people that came before us. I think sometimes, there'll be a day when I have great great great grandkids and wonder, will they know anything about me? I think so especially with the modern technology we have. It was different back in the days of my ancestors especially since pictures those days were so rare to begin with. I will pass this family history on to my kids and I hope they have the same appreciation and cherish these photos the way I do. It's really neat to see my daughters' faces in the images of their grandparents as children. Words cannot describe how much I love his project! I hope you enjoy it as much as I do and maybe inspires you to do something similar for your family. Happy New Year, All!


Sunday, October 28, 2012

No-Sew Princess Goodie Bags


My middle Princess just turned 6 and I wanted to come up with a cute and special goodie bag to give out to the girls as favors. I found this on Pinterest. They are super cute. I, however, didn't have enough time to get all fancy and make so many different choices so I opted for these pink and purple versions. It was 3 bags for a dollar at dollar tree and about 1 yard of tulle which was on sale for $4. I made 18 (just in case) so they were less than $1 per bag. What I love about these are that they can be put together with only hot glue! It took me about an hour to an hour and a half to complete all of them.


Make sure to use sharp scissors.


I just folded the tulle up the width I wanted and cut it for the length like this.


Next, I used a low heat hot glue gun (and so glad I did because my high-heat one would have burned my fingers). Bunch the tulle up and glue all the way around. 


Next using ribbon glue on top of the tulle edge overlapping.


This picture turned out blurry...oops! See how I wrapped it around and overlapped?


Ta-DAH! Aren't they adorable?? I put a couple little favors in each of them also. Much better than the plastic good bags, huh??


A Princess "Tea" Party...we really had pink lemonade.


A room full of princesses...aren't they adorable??


Princess6's Rapunzel cake. Find out how I made the cake HERE


Monday, September 24, 2012

{DIY} Removable Pillow Cover


Okay, so I decided to give you my novice version of a slipcover for those ugly throw pillows  you may have stuffed in a closet somewhere. Here's mine...I wasn't lovin' the 1992 mauve color. Instead I wanted it to match my Shabby Chic End Table in my living room so I got some fabric from JoAnn's and went to town. 

FIRST, WASH AND DRY YOUR FABRIC according to its directions! Then iron it. Do not skip this step!

First I got some newspaper (use tissue paper if you want) sharp scissors, and measuring tape.


I measured this pillow to be 16" by 17 1/2". So..I needed a 1/4" seam allowance so I added 1/2" to each measurement which brought me to 16.5" x 18" 


Now I applied the measurements to the newspaper and cut out my new pattern. For the back, since I wanted to make a slip cover I planned to have two overlapping pieces. So I took the longer measurement (18") by 6". The second piece I (should have) measured 18" x 14". You want the second piece to be closer to the size of the entire pillow so it covers adequately. 


Once you have the pieces all cut then pin, pin, pin. Don't be cheap with the pinning either. You want it to end up right.


I did two identical pillows so I overlapped the fabric so I only had to make the cuts once.

Here the front piece all cut out


This is the smaller back piece.


All the pieces cut out.


Now, take the two back pieces and on the long edge that you plan to sew for the opening fold it over and press. Then fold it over once more. I folded at about 1/8"-1/4" but didn't measure this part. I just wanted to hide the JoAnn logo. Iron both steps.


Next, top stitch the entire edge that you folded over. This will be the finished edge when you're done. Repeat for the larger back piece.


Next, put pillow front and the smaller back piece together with Right sides together. Put the small piece on first. Pin the upper edge.


Lay the larger back piece over the front and smaller piece. Make sure the finished edges are both in the middle of the pillow. Pin away!


Sew all around the pillow case with a 1/4 inch seam. There usually are markings on the machine to help guide the fabric. When you reach the corner, stop. Make sure the needle is through the fabric and lift the presser foot. Turn the fabric and put the presser foot back down. Keep sewing. Do this at each corner.


When you are finished sewing take the corner and clip straight across like this. It will help prevent bunching in the corners. 


Here's what it should look like. 


Turn the pillow cover inside out and make sure to push out the corners. Remember I said I "should have" measured the larger back piece differently? Well this is why...there wasn't enough fabric to overlap to cover the pillow adequately. 


So..since I have a pretty cool sewing machine I improvised. I used my button holer attachments and got out my sewing manual and made a button hole and sewed on a button.  


Related Posts Plugin for WordPress, Blogger...